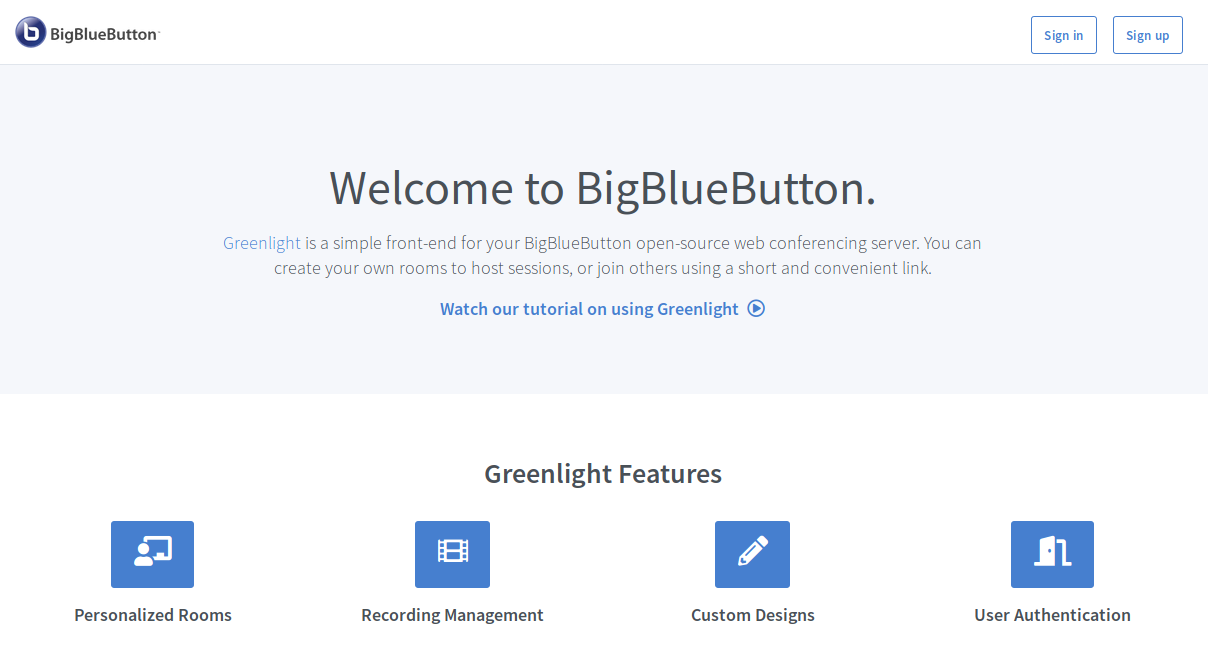
Greenlight provides a simple interface for users to create rooms, start meetings, and manage recordings. It is included with all Big Blue Meeting accounts and can be used even if you are also using Big Blue Meeting through the API for other systems like WordPress or Moodle.
Big Blue Meeting includes hosting for Greenlight for all customers including all install options installable through our manager control panel. You can sign up for a free trial and install Greenlight immediately to test it out.
For the end users, Greenlight provides:
Anyone can sign up for a fully functional (admin multi-user) free trial account on Big Blue Meeting and install Greenlight on their own domain or our generic meetings-server.com domain.
Greenlight is a feature rich application that aims to address all your BigBlueButton users needs.
Greenlight has full support for managing user accounts. It currently supports five types of user authentication:
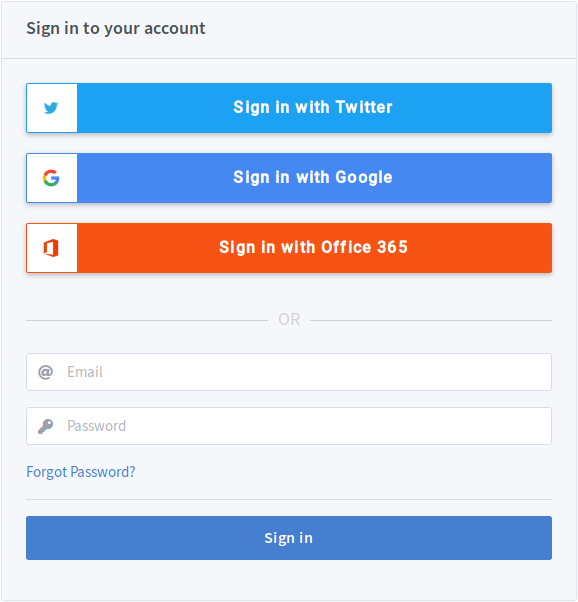
All of these authentication providers are configurable and during the installation process in Big Blue Manager your can configure any of them under the advanced tab. Turning off In-application authentication will disable user sign up. This allows you to preconfigure accounts for specific users who you want to have access to your server.
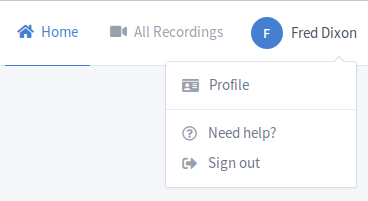
Once you are logged in, you’ll see your account appear in the top right corner of the screen. Clicking on the navigation items along side it allows you to traverse Greenlight.
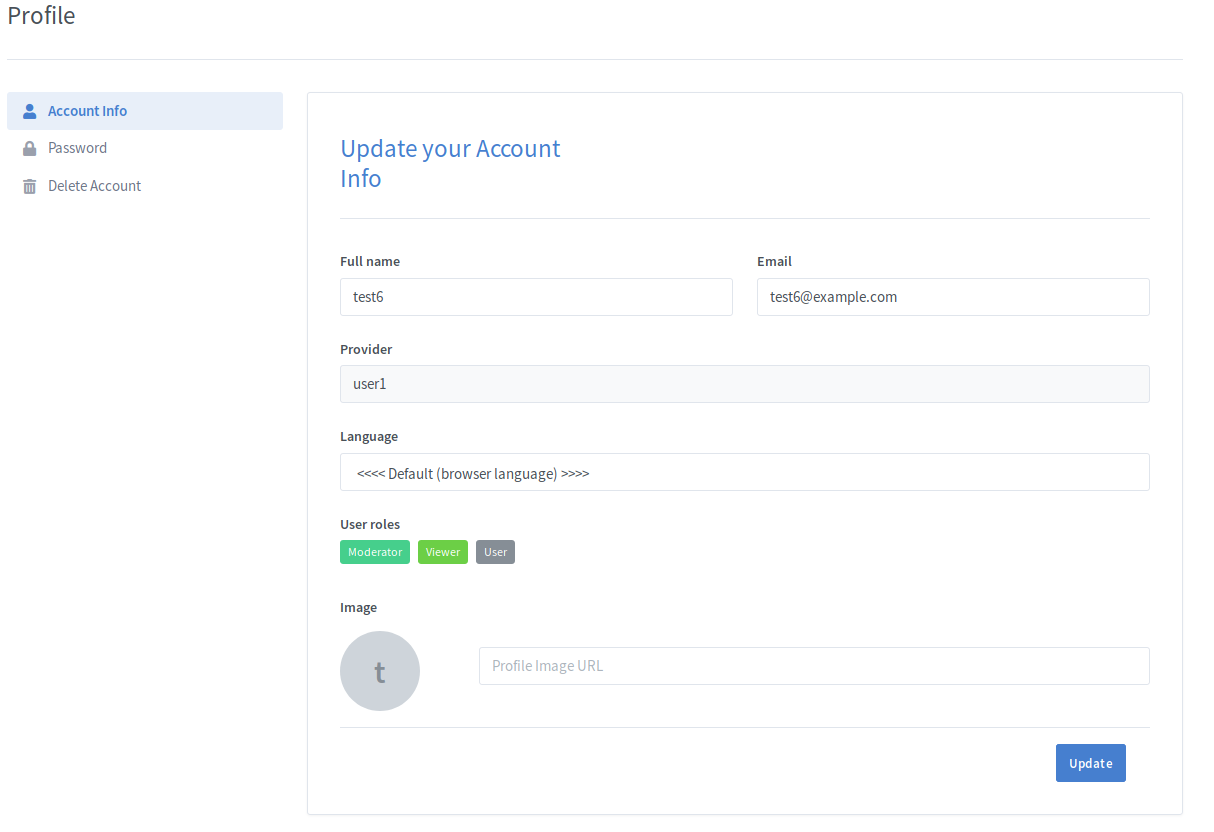
Greenlight also allows users to update their account information at any time, including changing their password, profile image, and language for Greenlight.
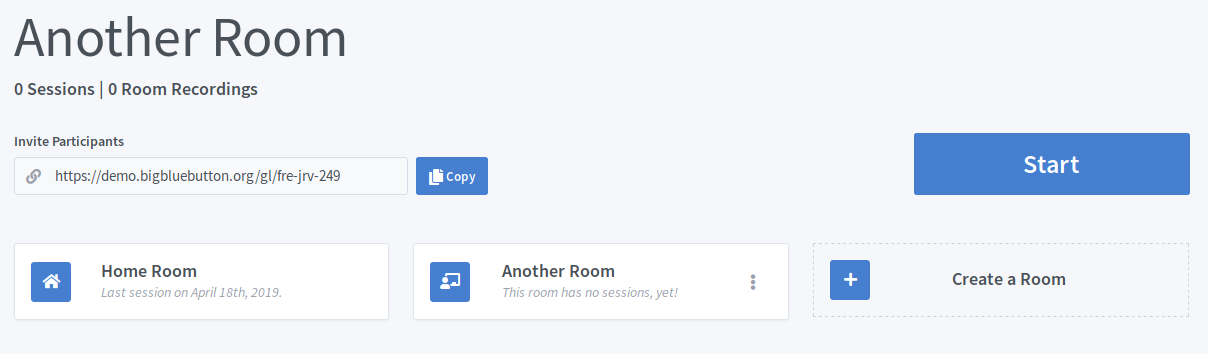
Greenlight is built around the concept of rooms. A room, to the user, is a BigBlueButton session that they “own”. A user can add custom room settings, start/stop their room, invite others to their room using a short easily communicable URL, track sessions, and more.
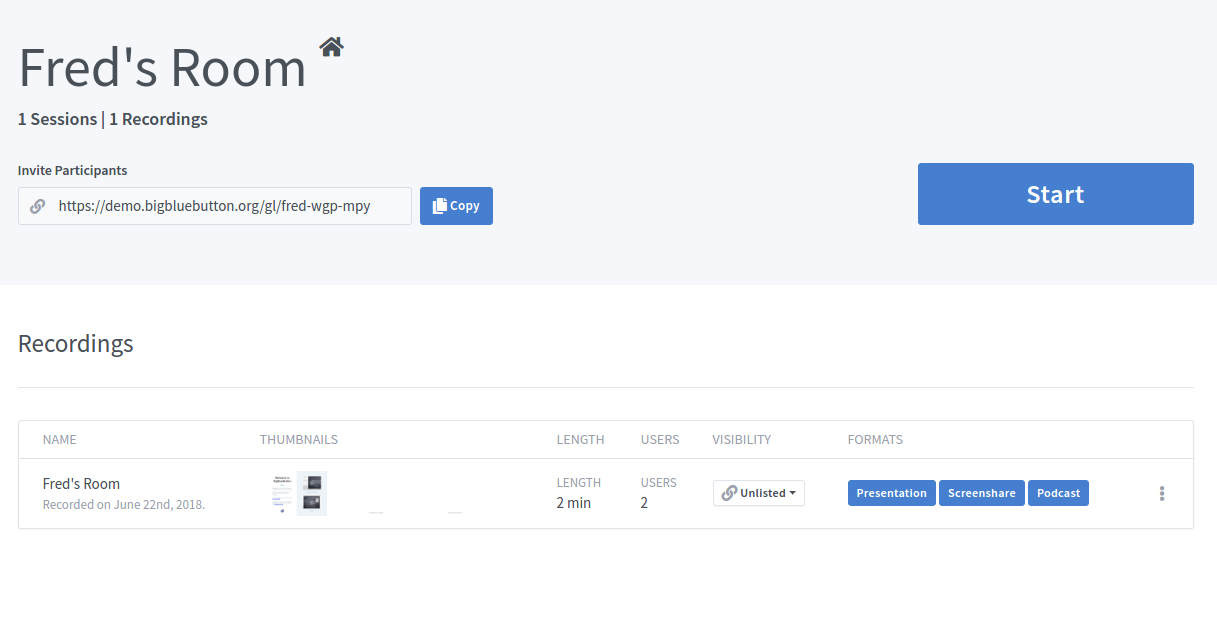
To invite someone to join your room, all you have to do is give them the invite URL on the room page. Once they follow the URL, they’ll be presented with an invitation to join your room. If the user doesn’t have a Greenlight account, they’ll be prompted to enter a name to join the room. Otherwise, Greenlight will use their account name.
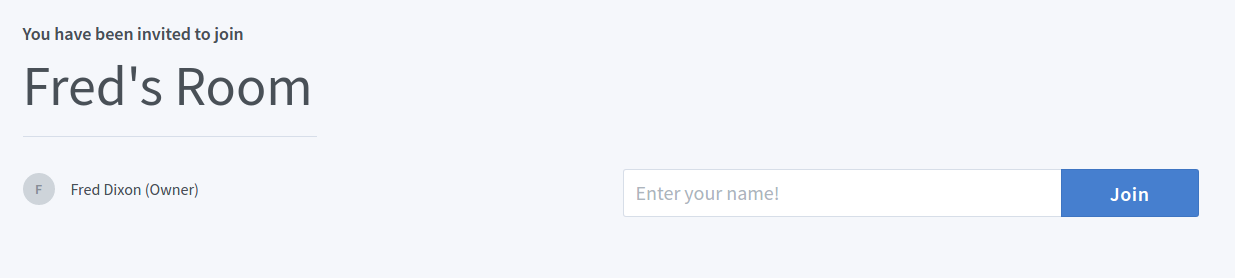
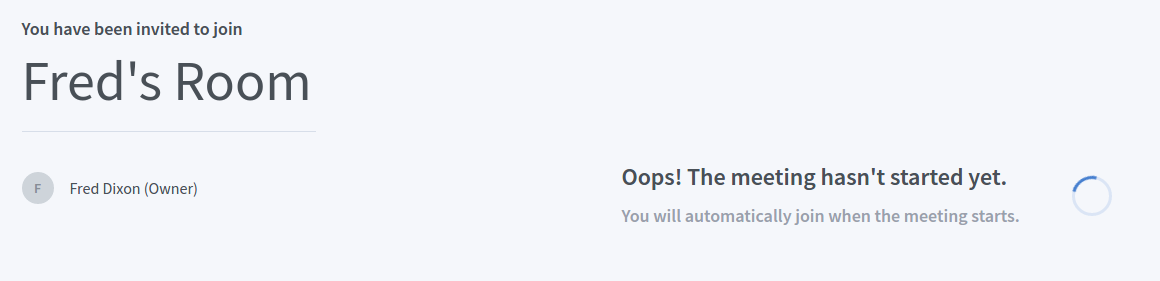
If the room is running, they’ll be instantly join in. However, if the room is not running they’ll be added to the wait list. Once the room starts, they’ll be automatically joined into the room with the owner. A user can leave the wait list simply by leaving the page.
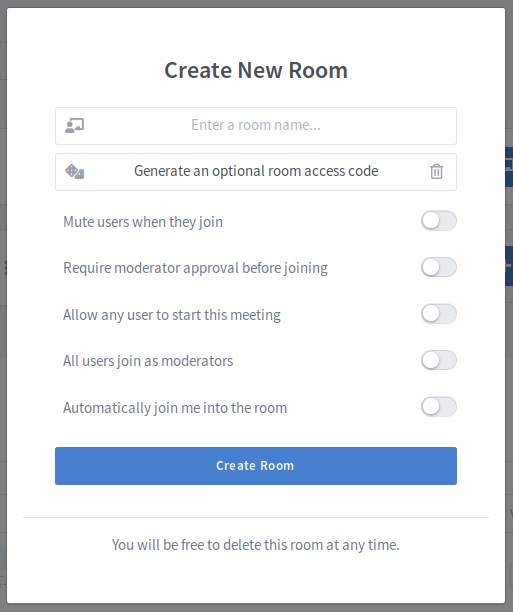
When you sign up for Greenlight, the application creates your home room which is named “Home Room”. You are free to create as many new rooms as you would like for different purposes. To create a new room, you simply click the “Create a Room” block from your list of rooms. You can configure room specific settings to customize each room. To see what each setting does, see Room Settings
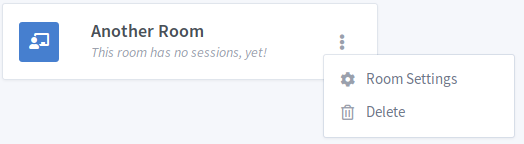
Your new room will then show under your current room, and you can click to switch between them. Your home room is the one with the home icon. You can delete a room using the room drop-down.
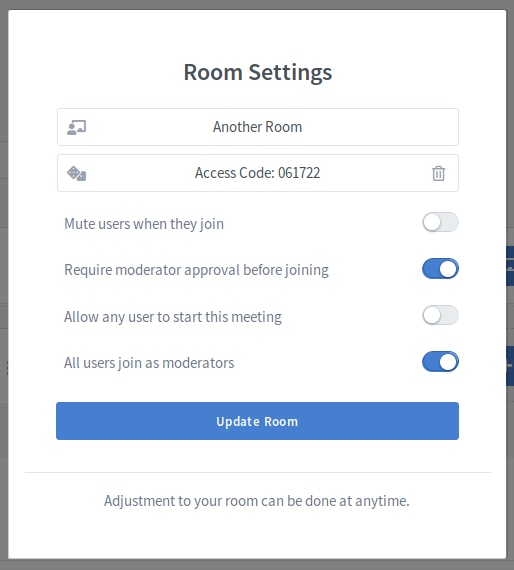
Note: Room setting changes will not apply to currently running/active meetings
| Setting | Description |
|---|---|
| Generate an optional room access code | Generates an access code that users must enter before they are allowed to join the room. An access code can be randomly generated by clicking the dice icon the left, and can be removed by clicking the garbage icon on the right. |
| Mute users when they join | Automatically mutes the user when they join the BigBlueButton meeting |
| Require moderator approval before joining | Prompts the moderator of the BigBlueButton meeting when a user tries to join. If the user is approved, they will be able to join the meeting. |
| Allow any user to start this meeting | Allows any user to start the meeting. By default, only the Room Owner will join as a moderator. |
| All users join as moderators | Gives all users moderator privileges in BigBlueButton when they join the meeting. |
| Automatically join me into the room | Automatically joins the user into the room after the room gets created successfully. |
Using the header
If you hover over the room name, you should see an edit icon
You can either click the edit icon or double click the header to enable editing mode:

Afterwards, you can change the name by clicking anywhere or pressing the enter key.
Using the Room block
If you look at a Room block, you will see 3 ellipsis which you can click to view the options for this room. You can click Room Settings to display a modal that will allow you to edit any of the Room’s features.
Afterwards, clicking Update Room will save the changes.
In the Room actions dropdown, there is a setting that allows users to share rooms.
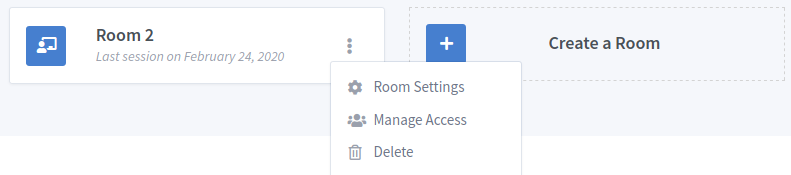
To share a room with another user, click on the dropdown and search for the user using either their email or their uid.

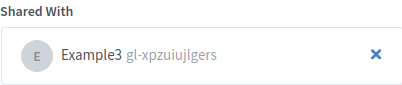
Once you click on a user to add, they will be added to the Shared With area in a pending state. No changes will be made unless the Save Changes button is clicked.

Users that the room has been shared with will appear in the following state:
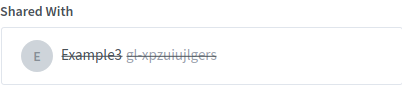
You can unshare a room with a user by clicking the x icon. Again, no changes will be save until the Save Changes button is clicked.
Once a room is shared, the users that it is shared with will have access to that room in their Room List. They will be able to view/start the meeting and view the recordings. Note that only the room owner can edit/delete the room and the recordings.
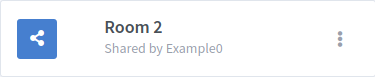
For the User that has the room shared with them, the room will now appear in their room list with a share icon and the name of the user that shared the room with them.
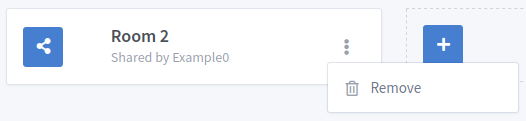
The User also has the option to remove an unwanted shared room from their room list.
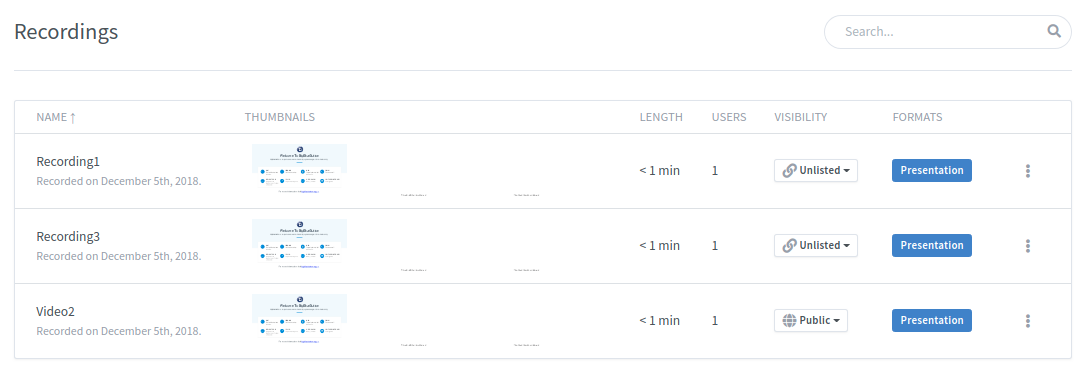
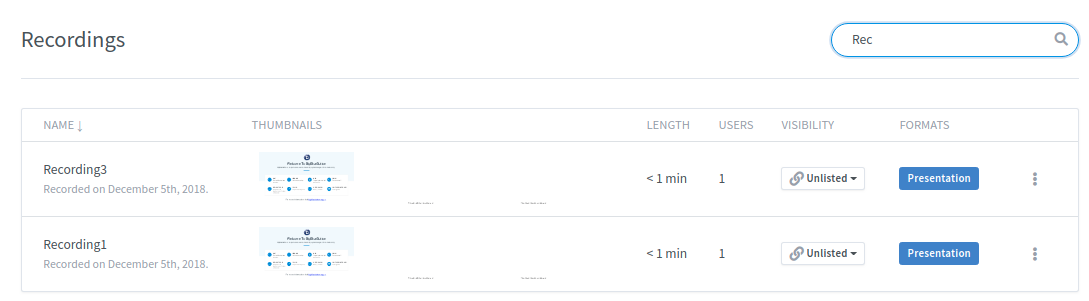
On your room page, all recordings for that room will be listed at the bottom under the recordings subtitle. This table contains information about the recording, as well as its recorded formats. You can click on any of these formats and you’ll open the recording in a new tab.

Each recording has a visibility associated with it, which can be changed by clicking on it in the recordings table. By default, it is set to unlisted.
Public: everyone can view it if they have the room link.
Unlisted: only users who have the recording link can view it.
Using the drop-down in the recordings table, you have the ability to delete a recording or mail a recording to a friend. Keep in mind, emailing an unlisted recording will allow the friend access, so if you want a recording to be completely private, don’t share the recording link.
Deleted recordings are not recoverable, so be sure when deleting a recording.
Renaming Recordings directly using the Recording Title
To edit the recording name directly using the title, you can hover over the title and see an edit icon.
You can either click the edit icon or double click the title to enable editing mode:
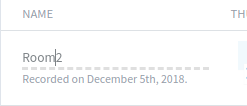
Afterwards, you can change the name by clicking anywhere or pressing the enter key.
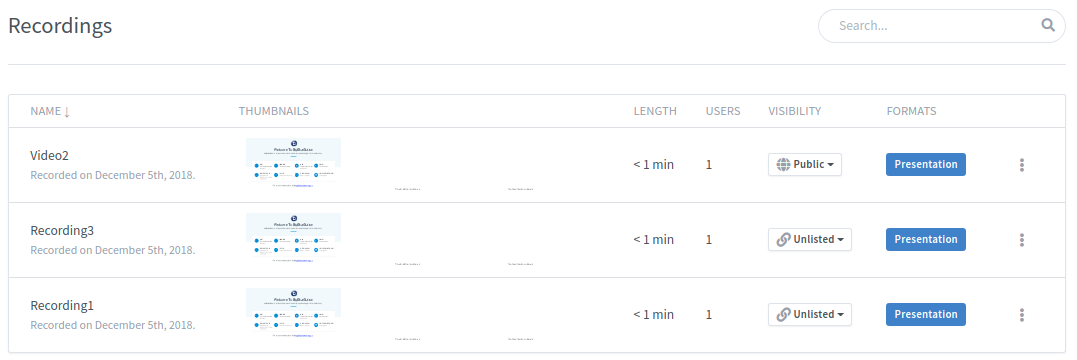
It is possible to sort recordings by metrics such as Name, User Number, and Length of Recording.
This can be done by clicking on the headers of the table (cycles through ascending, descending, and no particular order):
There is also a live search that may return any part of the recording name:
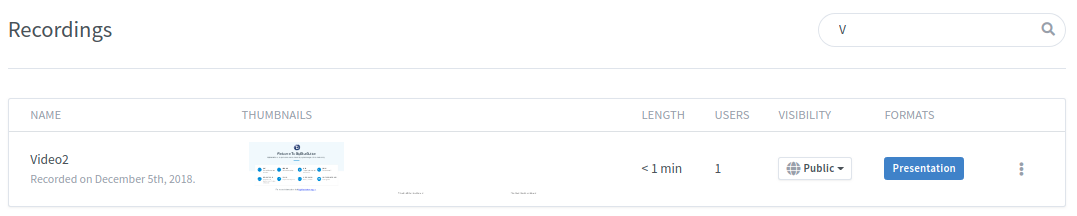
Searching and sorting can be used in conjunction:
 Afrikaans
 العربية
 български
 বাংলা
বাংলা
 Čeština
 Dansk
Dansk
 Deutsch
 Ελληνικά
 English (US)
 Español
 فارسی
فارسی
 Suomi
Suomi
 Français
 עִבְרִית
 हिन्दी
 Bahasa Indonesia
 Italiano
 日本語
日本語
 한국어
한국어
 Latviešu valoda
 Bahasa Melayu
 Nederlands
 Norsk Bokmål
 Polski
 Português
 Русский
 Kiswahili
 Svenska
 ไทย
ไทย
 Türkçe
 Українська
 Tiếng Việt
 简体中文
简体中文
 繁體中文
繁體中文